

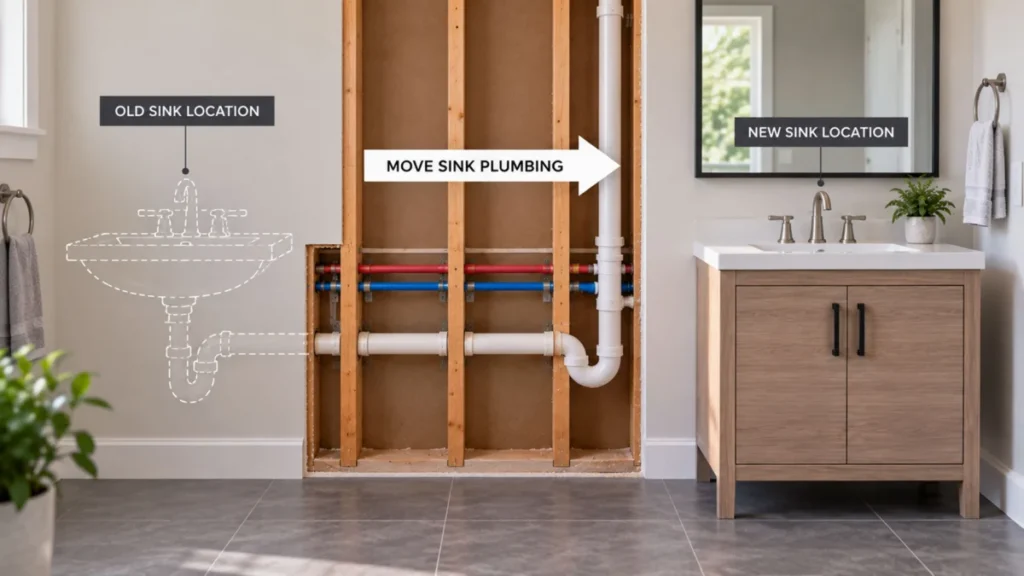
Relocating a bathroom sink is one of the most common upgrades homeowners undertake during a bathroom renovation—and yet, it remains one of the most misunderstood aspects of residential construction. Whether you are shifting a vanity a few inches to accommodate a modern shower enclosure or moving a basin to an entirely different wall to optimize flow, the plumbing work required is the literal foundation of your bathroom’s functionality.
Executing a successful plumbing relocation is the difference between a seamless, long-lasting installation and a slow, catastrophic leak hidden deep within your wall cavity. This guide provides a deep dive into the planning, technical requirements, regulatory frameworks, and professional practices necessary to ensure your project stands the test of time.
The Strategic Importance of Proper Planning
Before you touch a pipe wrench, you must define the scope of your project. Most sink relocations fall into one of two categories: the "Minor Shift" (a few inches to clear a new vanity frame) or the "Systemic Move" (moving the basin to an opposing wall).
Understanding the why behind your move is critical. A six-inch horizontal shift can often be managed with flexible supply lines and an extended trap arm, requiring minimal structural interference. Conversely, moving a sink several feet or across a room is a major mechanical operation that requires opening wall cavities, re-routing complex drain lines, and ensuring that the new configuration maintains the necessary pitch (slope) and venting.
Understanding the Three Core Plumbing Systems
A bathroom sink is not a single connection; it is an integrated system consisting of three distinct components, each governed by specific hydraulic rules:
- The Supply Lines: These carry pressurized hot and cold water. Because they operate under pressure, they are the easiest to extend using modern materials like PEX or copper.
- The Drain Line: This carries greywater away via gravity. Unlike supply lines, drains rely entirely on a consistent, downward slope (typically 1/4 inch per foot) to prevent debris buildup and clogs.
- The Vent System: Often overlooked by amateurs, the vent is the "lungs" of your plumbing. It allows air to enter the system, preventing the vacuum effect that can pull water out of your P-trap and allow sewer gases to enter your home.
The Chronology of a Professional Relocation
Executing a plumbing move requires a disciplined, step-by-step approach to avoid costly rework.
Step 1: Design and Site Preparation
Measure from a fixed, permanent reference point—usually a corner of the room—to establish the center line of the new basin. Standard rough-in heights for a modern vanity are typically 18 to 22 inches from the floor for the drain, and 20 to 24 inches for the supply lines. Use a high-quality stud finder to map out the framing, ensuring you aren’t planning to route pipes through load-bearing structural members.
Step 2: Regulatory Compliance and Permitting
Many homeowners erroneously believe that internal plumbing is exempt from oversight. However, in the UK, work involving soil stacks is subject to Building Regulations Part G and Part H. In the United States, almost all jurisdictions require a permit for moving drain and vent lines. Unpermitted work is a red flag during property inspections and can lead to the denial of insurance claims related to water damage. Always consult your local building control office before starting.
Step 3: Isolation and Deconstruction
Turn off the water at the main stopcock or the local isolation valves. Open all faucets to bleed the pressure and drain residual water. Once the area is dry, disconnect the supply lines and the P-trap. When opening the wall, use a utility knife to score the plasterboard; cutting back to the center of the studs ensures that patching the wall later will be structurally sound and cosmetically invisible.
Step 4: System Reconfiguration
This is the heart of the project. When running new drain lines, ensure you maintain the required pitch. Dry-fit every connection first. Solvent cement sets in seconds; there is no room for error once the pipe is fused. For the venting, if your new location exceeds the maximum trap-arm distance, you must install a new vent stack or utilize an Air Admittance Valve (AAV) if permitted by your local code.
Step 5: Pressure Testing and Commissioning
Before you even think about closing the wall, perform a rigorous pressure test. Cap the supply lines, restore water pressure, and inspect every joint with a dry paper towel for at least 30 minutes. A paper towel will reveal a microscopic "weep" that the human eye might miss. For the drain, perform a "slug test"—fill the basin and release all the water at once. This sudden surge puts more stress on the joints than a trickling tap and is the ultimate test of your workmanship.
Supporting Data: Cost Expectations and Economic Realities
The complexity of a move is directly proportional to its cost. Below is a breakdown of typical professional pricing (estimates vary by region):
| Project Scope | Estimated Professional Cost |
|---|---|
| Minor shift (under 12", same wall) | £150 – £400 / $200 – $500 |
| Same-wall relocation, new drain branch | £400 – £900 / $500 – $1,200 |
| Move to a different wall | £900 – £2,000 / $1,200 – $2,500 |
| Concrete slab or joist alteration | £2,000+ / $2,500+ |
DIY enthusiasts can expect to spend between £80 and £250 on materials alone. However, this budget assumes that no professional intervention is required to correct mistakes.
Official Guidelines and Common Pitfalls
Professional plumbing associations and building inspectors emphasize several common errors that lead to financial loss:
- Inadequate Slope: If the drain pipe doesn’t have a consistent drop, water will pool, leading to chronic clogs and bacteria growth.
- Improper Venting: Failing to tie into an existing vent system is the #1 cause of slow-draining sinks and "gurgling" sounds.
- The "Hidden" Leak: Closing a wall before performing a pressure test is the most common cause of mold growth and structural damage inside wall cavities.
- Unsupported Pipework: Pipes that are not properly clipped will vibrate due to "water hammer" (the pressure surge when a faucet is closed), which eventually loosens joints and leads to leaks.
Implications for Your Home’s Value
A properly relocated sink can significantly improve the ergonomics and aesthetic flow of a bathroom, directly contributing to the resale value of your property. Conversely, poorly executed plumbing is a liability. Prospective buyers often include plumbing inspections as a contingency in their purchase agreements. Discovering non-compliant or "shoddy" DIY plumbing can lead to price renegotiations or the total collapse of a sale.
When to Call in the Professionals
While many aspects of home improvement can be learned through tutorials, there are specific scenarios where professional intervention is non-negotiable:
- Work on Main Stacks: If you are altering a main waste stack, you are dealing with the primary drainage system of the entire house.
- Structural Modifications: If you need to cut through floor joists or load-bearing studs to route your pipework, you risk the structural integrity of your home.
- Complex Venting: If the new location is far from an existing vent and requires complex re-routing, a master plumber’s expertise in fluid dynamics is required to ensure the system functions correctly.
Conclusion
Learning to move bathroom sink plumbing is a journey of respecting the physics of water and the regulations of your local building authority. The fundamentals are constant: maintain proper drain slope, ensure robust venting, and perform exhaustive testing before closing your walls.
For those tackling this as part of a larger renovation, consider integrating your plumbing project into a cohesive design strategy. Resources like Home Comfort Experts provide excellent guidance on marrying technical utility with high-end aesthetic design. By balancing these practical steps with thoughtful layout planning, you ensure that your renovated bathroom is not only functional and compliant but also a significant enhancement to your home’s overall comfort and market value.
Remember, there is no shame in performing the demolition and wall patching yourself while retaining a licensed plumber for the critical pipework. Sometimes, the smartest part of a DIY project is knowing exactly where to invite the experts in.